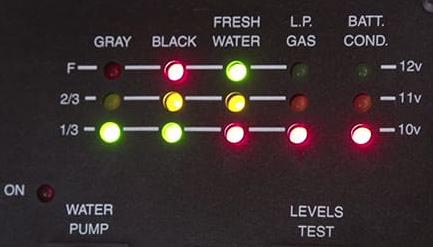
Maintaining a properly functioning RV black tank is essential for a smooth and enjoyable road trip experience. However, many RVers encounter issues with their black tank sensors, which can lead to inaccurate readings and frustrations. In this blog post, we will delve into the common challenges faced by RV owners when dealing with sensor-related problems and explore the process of replacing black tank sensors.
Black tank sensors are responsible for measuring the levels of waste within the tank, allowing you to monitor when it’s time to empty it. Over time, these sensors can become coated with residue and debris, leading to inaccurate readings. This buildup often occurs due to various factors such as the composition of waste, toilet paper usage, and lack of regular cleaning.
Before considering sensor replacement, it’s crucial to explore some troubleshooting options that might help resolve the problem without resorting to more invasive measures. Here are a few steps to consider:
[dipi_library_layout id=”137″]
- Manual Cleaning: Start by draining and flushing your black tank thoroughly. Afterward (this is not always possible depending on your tank configuration) using a soft brush or sponge, gently scrub the sensors located inside the tank. Avoid using abrasive materials or chemicals that could damage the sensors or tank surfaces. Rinse the tank again and check if the sensor readings have improved.
- Vinegar and Baking Soda Method: Another effective technique involves creating a cleaning solution with vinegar and baking soda. Begin by draining your black tank, then pour a mixture of one cup of vinegar and one cup of baking soda into the tank. If needed you can double or triple the mixture as well to ensure it reaches all the sensors. Let it sit for a few hours or overnight to break down any residue. Finally, flush the tank with clean water and check if the sensors are functioning correctly.
- Calibrating the Sensors: Some RVs allow for sensor calibration. Consult your RV owner’s manual to determine if your system has this feature. Calibration helps recalibrate the sensors to accurately reflect the waste levels in the tank.
If the troubleshooting methods mentioned above fail to improve the sensor accuracy, it might be time to consider replacing the sensors. Sensor replacement should be approached with caution, as it involves working with the internal components of the black tank. Here are the key steps to follow:
- Gather the Required Tools and Materials: Before you start, ensure you have the necessary tools and replacement sensors for the job. This typically includes a screwdriver, pliers, replacement sensors compatible with your RV model, sealant, and potentially a hacksaw or utility knife.
- Drain the Tank and Disconnect Power: Begin by completely emptying the black tank and disconnecting any power sources to ensure safety throughout the process.
- Locate the Sensors: The black tank sensors are typically positioned on the exterior side of the tank, often accessible through an inspection port. Remove any covers or panels necessary to gain access to the sensors.
- Remove the Old Sensors: Carefully unscrew the fasteners securing the old sensors in place. Depending on your RV model, you might need to cut out a plastic circle or use pliers to remove the sensors. Take note of the wiring connections and how the sensors are positioned.
- Install the New Sensors: Follow the manufacturer’s instructions to install the replacement sensors. Ensure they are correctly aligned and securely fastened. Take care to reconnect any wiring as it was before.
- Test the Sensors: Once the new sensors are installed, reassemble any covers or panels and reconnect the power source. Fill the black tank with water and verify if the new sensors provide accurate readings.
While sensor-related issues with RV black tanks can be frustrating, it’s important to exhaust all possible troubleshooting options before considering sensor replacement. Regular cleaning, proper waste management, and cautious maintenance can significantly extend the lifespan of the black tank sensors and minimize the chances of encountering sensor-related problems. However, if all attempts to clean and troubleshoot the sensors have been unsuccessful, replacing the sensors may be necessary.
Sensor replacement should be approached with care, as it involves working with the internal components of the black tank. Following the steps outlined in this blog post and referring to your RV owner’s manual will help ensure a smooth and successful sensor replacement process.
Remember, if you’re uncomfortable or unsure about replacing the sensors yourself, it’s always advisable to seek professional assistance from an RV service technician who can provide expert guidance and ensure the job is done correctly.
By addressing the issue of black tank sensor replacement and providing detailed instructions, we hope this blog post has been helpful in assisting RV owners in resolving their sensor-related problems. With accurate sensor readings, you can confidently manage your black tank and enjoy worry-free RV adventures.


